People often take action to winterize their external pipes and taps, but not many think about their irrigation systems. If you don’t pay them due care and attention, you can often end up with expensive repairs come spring.
In essence, you need to drain your irrigation system and close it down for the winter as soon as the need for irrigation is temporarily over. Here, in this brief guide, we will be going over how to how to employ the blowout method. But, in addition, we will also touch briefly on the other two main types of winterization - namely, the manual and automatic drainage methods.
The Manual Drainage Procedure
If your irrigation system is one that is equipped with manual draining, all you have to do to get excess water out of the system is to open a valve. Here are the steps to follow:
- Close down the water supply
- Locate the manual valves installed at the extremities and the low points of the system.
- Open all valves and allow the water to drain out.
- Be sure also to drain the backflow device.
If your system has check valves that allow water to flow in one direction only, you will need to lift the sprinkler heads slightly. This should encourage any water to escape. Once the system has been fully drained, don’t forget to close the valves.
The Automatic Drainage Procedure
Irrigation systems that have automatic draining built-in, have valves that facilitate draining any water automatically. It normally happens when the water pressure drops below a specific value of pounds per square inch. Here are the steps to follow if you want to manually engage the drainage function:
- Shit down the water supply
- Open one of the sprinkler heads to reduce the water pressure.
- The rest is automatic.
The only thing you may still need to do by hand is to drain off any water caught between the backflow device and the shut-off valve. Also, if the sprinkler heads are fitted with check valves, they too will need emptying manually.
The Blowout Method Procedure
Now we come to the main meat of this article - the section on the Blowout winterization procedure. This method involves forcing compressed air through the system, which pushes any excess water out through the sprinkler heads. The one thing you must verify is that your irrigation system can handle the pressure the compressor throws out.
If not done by the book, this blowout method can be hazardous, so you must observe the appropriate safety procedures. If you don’t, you might not only damage the irrigation system - you might also injure yourself.
If this will be the first time you’ve ever worked with compressed air or that you have ever tried the blowout procedure, we recommend that you talk to a professional before you do anything else. You don’t want to destroy your irrigation system, incur significant repair costs or run the risk of hurting yourself.
Once you are ready to proceed, you will need the following materials:
- A compressor with a 50 to 100 PSI rating
- An air hose
- A coupler ar adaptor that fits your irrigation system
- A pair of safety glasses
Before you do anything else, put your safety glasses on.
The Hook-up Procedure
The first thing to do (after putting your safety specs on) is to shut down both of the valves on your system’s backflow preventer. Having done that, remove the blowout port plug, and insert the quick-connect adaptor, being sure to screw it in nice and tight. Clip on the air hose and fit to the other end of your compressor.
Setting Up the Compressor
Bear in mind that most home compressors are not powerful enough to blow out the whole irrigation system in one go - unless, of course, it’s a tiny system, in which case you would probably do it manually - anyway, I digress. With a larger irrigation system, you will probably do this procedure one zone at a time.
If you’re a numbers boffin and you still got the original irrigation layout indicating the GPM (gallons per minute) of each sprinkler head, you can divide the total GPM for each of the zones by 7.5. The answer will give you the CFM (cubic feet per minute) required to blow out that zone. If numbers aren’t your thing, or you haven’t still got the original layout, renting a 10 CFM compressor from your local rental store will suffice.
Useful tip: If the pipes of your irrigation system are made from PVC, don’t let the compressed air pressure get above 80 PSI. If it has polyethene pipes, the pressure shouldn’t be allowed above 50 PSI.
- Shut down the water supply
- Open up one zone of your irrigation system.
- If there is a manual drain valve at the end of the zone, open it.
- Connect the airline to the blowout port.
- Connect the other end to the compressor and proceed to blow out the zone.
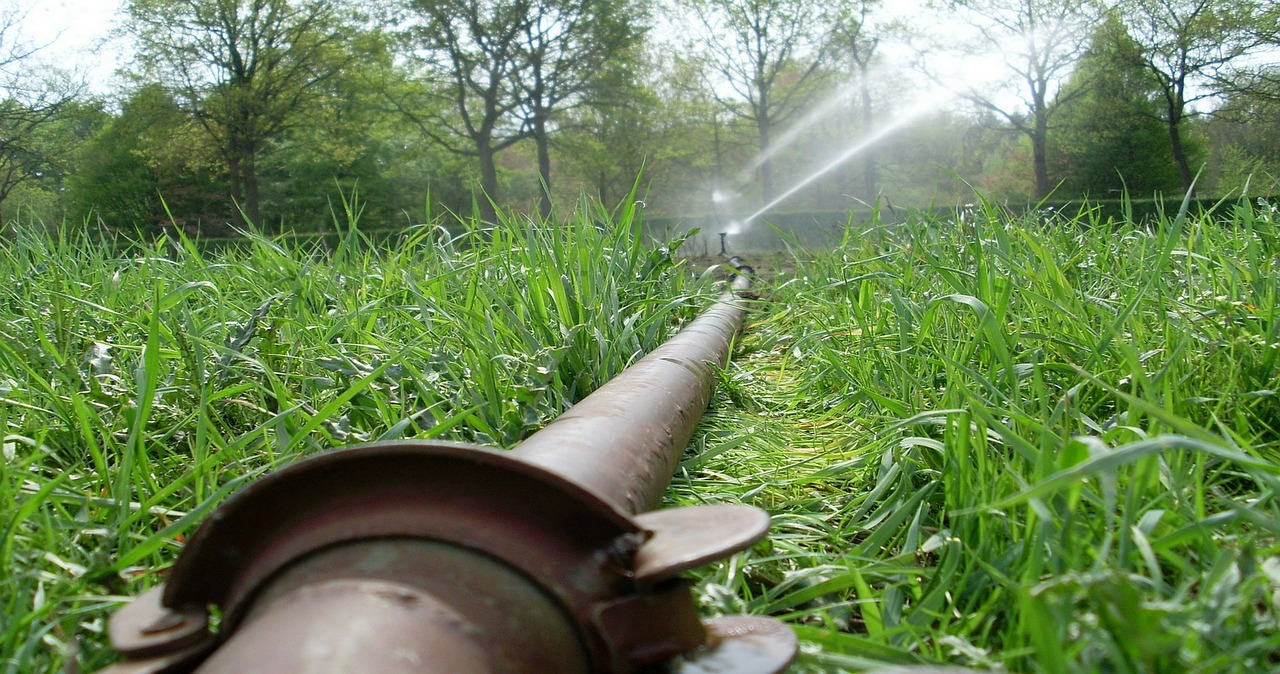
- The sprinkler heads will pop up and spray out water.
- Once they stop emitting water, disconnect the hose.
- Whatever you do, don’t continue to blow out the zone because, with no water left to cool the plastic gears, they might melt in under 60 seconds.
- Carry on, zone by zone until complete.
- To be completely thorough, complete the entire procedure one more time.
- Having drained the water from each sprinkler head, you can then disconnect the compressor from the irrigation system.
- Let any residual pressure out of the system.
- Release any pressure there may still be in the backflow device by opening the valves.
- Close the valves.
Once you are sure all the valves have been closed, it’s job done.
Hopefully, your irrigation system is now completely drained. If you run into any trouble with this procedure, it’s best to talk to a professional.